
ore ida tater tots cooking instructions
Ore-Ida Tater Tots Cooking Instructions
Cooking Ore-Ida Tater Tots offers multiple avenues to achieve that perfect golden crisp. Whether you prefer the even heating of an oven, the rapid crisping of an air fryer, or the quick convenience of a microwave, understanding each method is key. Let’s explore these techniques!
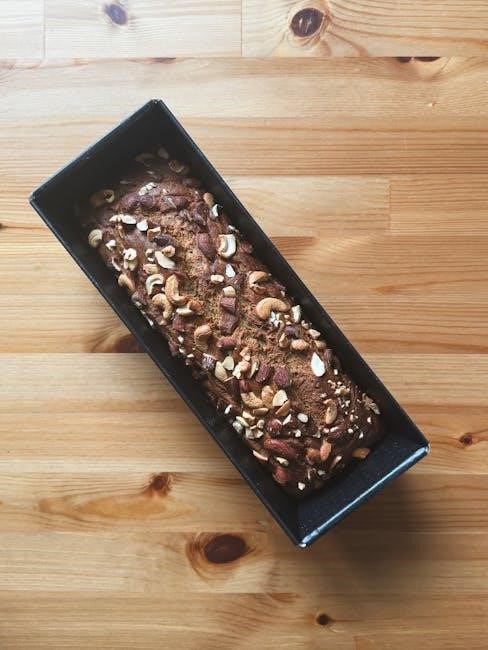
Ore-Ida Tater Tots, those iconic, bite-sized potato cylinders, are a beloved staple in many households. Their appeal lies in their simplicity and versatility, serving as a delightful side dish, a fun snack, or even a creative ingredient in various recipes. While seemingly straightforward to prepare, achieving the perfect balance of a crispy exterior and a fluffy interior requires attention to detail.
This guide aims to provide comprehensive cooking instructions for Ore-Ida Tater Tots, ensuring consistently delicious results regardless of your chosen cooking method. We will explore the nuances of oven baking, air frying, and microwaving, highlighting the optimal techniques for each. Whether you’re aiming for a classic golden-brown crisp or seeking a quick and convenient option, we’ve got you covered.

Beyond the basic instructions, we’ll also delve into tips and tricks to elevate your Tater Tot experience. From preheating techniques to proper arrangement on baking sheets, these insights will help you avoid common pitfalls and unlock the full potential of these potato gems. Get ready to master the art of cooking Ore-Ida Tater Tots and transform them into a culinary delight!
Oven Cooking Method
The oven method remains a steadfast and reliable approach for cooking Ore-Ida Tater Tots, yielding a uniformly golden and crispy result when executed correctly. This technique harnesses the power of consistent heat to evenly cook the tater tots, ensuring a satisfying texture throughout. However, optimal results hinge on adhering to specific preheating and baking guidelines.

To begin, preheating the oven to the recommended temperature is crucial. This ensures that the tater tots are immediately exposed to the correct heat, preventing sogginess and promoting crisping. Next, proper arrangement on a baking sheet is paramount. A single layer, with adequate spacing between each tot, allows for optimal air circulation, leading to even browning and crispiness.

During the baking process, it’s beneficial to turn the tater tots halfway through. This simple step ensures that all sides are exposed to the heat, resulting in a more uniform color and texture. Monitoring the baking time is also essential, as overcooking can lead to dryness, while undercooking can result in a less-than-desirable texture. With careful attention to these details, the oven method guarantees a batch of perfectly cooked Ore-Ida Tater Tots.
Preheating the Oven
Before embarking on the oven-baking journey for your Ore-Ida Tater Tots, the critical first step involves preheating the oven. This seemingly simple action is paramount to achieving that coveted golden-brown exterior and fluffy interior. Neglecting to preheat adequately can lead to uneven cooking and a less-than-satisfying final product.
The recommended preheating temperature for Ore-Ida Tater Tots is typically 425 degrees Fahrenheit (220 degrees Celsius). This high temperature ensures that the tater tots are exposed to intense heat from the moment they enter the oven, promoting rapid crisping and preventing sogginess. Allow the oven to fully preheat before placing the tater tots inside; this usually takes around 10 to 15 minutes, depending on your oven model.
To verify that your oven has reached the desired temperature, rely on its built-in indicator light or thermometer. Avoid relying solely on guesswork, as an inaccurate temperature can significantly impact the cooking outcome. Once the oven is preheated to the correct temperature, you’re ready to arrange your Ore-Ida Tater Tots on a baking sheet and embark on the next stage of the oven-baking process, confident that you’ve set the stage for success.
Arranging Tater Tots on Baking Sheet
Once your oven is preheated to the ideal temperature, the next crucial step in achieving perfectly cooked Ore-Ida Tater Tots lies in how you arrange them on the baking sheet. This seemingly minor detail can significantly impact the final outcome, influencing both the crispiness and evenness of cooking. The key is to ensure that each tater tot has ample space to breathe and receive direct heat.
Begin by selecting a baking sheet that is large enough to accommodate all your tater tots in a single layer without overcrowding. Overcrowding traps steam, leading to soggy bottoms rather than the desired golden crisp. If necessary, use two baking sheets to ensure adequate spacing.

Line the baking sheet with parchment paper. This prevents sticking and facilitates easy cleanup. Then, carefully arrange the frozen Ore-Ida Tater Tots in a single layer on the prepared baking sheet, ensuring that they are not touching one another. A small gap between each tater tot allows for optimal air circulation, promoting even browning and crisping on all sides. Resist the urge to pile them up. By taking the time to arrange them properly, you’re setting the stage for perfectly cooked, crispy Ore-Ida Tater Tots every time.
Baking Time and Temperature
Achieving the perfect balance of a crispy exterior and a fluffy interior for your Ore-Ida Tater Tots hinges significantly on the correct baking time and temperature. The ideal conditions ensure the tater tots are cooked through without becoming overly dry or burnt. Typically, a preheated oven set to 425 degrees Fahrenheit (220 degrees Celsius) provides optimal results.
Once the oven is preheated, place the baking sheet with the evenly spaced tater tots on the middle rack. This placement ensures consistent heat distribution. The baking time generally ranges from 18 to 22 minutes, but it’s crucial to monitor the tater tots closely, as oven variations can affect the cooking speed.
Keep an eye on the color of the tater tots. You’re looking for a light golden-brown hue, indicating they are becoming crispy. To ensure even cooking, it is recommended to flip the tater tots halfway through the baking time, around the 10-11 minute mark. This helps both sides achieve that desirable golden crisp. Remember, these are guidelines, and adjustments may be necessary based on your oven.
Turning Tater Tots for Even Cooking
To achieve uniformly golden and crispy Ore-Ida Tater Tots in the oven, the simple act of turning them halfway through the baking process is crucial. This step ensures that all sides of the tater tots are exposed to the heat, preventing one side from becoming overly browned while the other remains pale and undercooked. By flipping them, you promote even heat distribution, leading to a more satisfying texture and appearance.

Typically, when baking at 425°F (220°C), you should turn the tater tots after approximately 10 to 11 minutes. Use a spatula to gently flip each tater tot, ensuring they are not overcrowded on the baking sheet. Overcrowding can steam the tater tots, hindering the crisping process. After turning, continue baking for another 10 to 11 minutes, or until they reach a light golden-brown color.
Observing the color change is key to knowing when they’re perfectly done. The aim is to have a consistent golden hue across all surfaces. This simple technique transforms your tater tots from potentially unevenly cooked to perfectly crisp and delicious, making every bite a delightful experience.
Air Fryer Cooking Method
The air fryer has revolutionized the way we cook frozen favorites like Ore-Ida Tater Tots, offering a quicker and often healthier alternative to deep frying and even oven baking. This method excels at producing exceptionally crispy exteriors while maintaining a soft, fluffy interior, closely mimicking the results of traditional frying but with significantly less oil. The rapid circulation of hot air ensures even cooking and browning, making it a preferred choice for many tater tot enthusiasts.
To successfully cook Ore-Ida Tater Tots in an air fryer, several factors contribute to the optimal outcome. Preheating the air fryer is crucial, as it ensures that the tater tots are immediately subjected to high heat, promoting crispness from the start. Arranging the tater tots in a single layer within the air fryer basket is also essential, preventing overcrowding and allowing hot air to circulate freely around each piece.
Lightly spraying the tater tots with olive oil or cooking spray can further enhance their crispiness and add a touch of flavor. The cooking time typically ranges from 10 to 12 minutes at 400°F (200°C), but it’s important to monitor them closely and shake the basket halfway through to ensure even cooking. The result is perfectly golden and crispy tater tots, ready to be enjoyed as a snack or side dish.
Preheating the Air Fryer
Preheating your air fryer is a crucial step when cooking Ore-Ida Tater Tots, often overlooked but significantly impacting the final texture and overall quality. Think of it as setting the stage for culinary success; a preheated air fryer ensures that the tater tots are immediately exposed to the required high temperature, promoting even and rapid cooking. This initial burst of heat is essential for achieving that desirable crispy exterior while maintaining a tender, fluffy interior.
Skipping the preheating step can lead to unevenly cooked tater tots, where some parts remain soggy while others become overly browned. A cold start requires a longer cooking time, potentially drying out the tater tots and compromising their overall flavor. Preheating also helps to create a Maillard reaction, the chemical process that gives browned foods their distinctive flavor.
Typically, preheating an air fryer for tater tots involves setting it to 400°F (200°C) for approximately 5 minutes. This short wait ensures that the air fryer reaches the optimal temperature, providing a consistent cooking environment. Consult your air fryer’s manual for specific preheating instructions, as some models may have variations. Once preheated, your air fryer is primed and ready to transform those frozen tater tots into golden, crispy delights.
Preparing Tater Tots for Air Frying
Before introducing your Ore-Ida Tater Tots to the air fryer’s heated embrace, a few simple preparations can significantly enhance the final result. Begin by retrieving the desired quantity of frozen tater tots from the bag. There’s no need to thaw them; in fact, cooking them directly from frozen is preferable to maintain their shape and texture.
Next, consider a light coating of oil. While not strictly necessary, a spritz of olive oil or cooking spray can promote even browning and crispness. Place the tater tots in the air fryer basket and lightly coat them, ensuring they are evenly covered. Avoid overcrowding the basket, as this can impede proper air circulation and lead to uneven cooking. It’s better to cook in batches if needed.
For added flavor, feel free to experiment with seasonings. A sprinkle of garlic powder, onion powder, paprika, or even a dash of your favorite spice blend can elevate the taste of your tater tots. However, exercise caution with salt, as tater tots already contain sodium. Remember to distribute the seasonings evenly for a consistent flavor profile. With these simple steps, your tater tots are primed and ready to transform into crispy, golden-brown perfection within the air fryer.

Air Frying Time and Temperature
Achieving perfectly air-fried Ore-Ida Tater Tots hinges on precise time and temperature control. A preheated air fryer is crucial for optimal results. Set your air fryer to 400 degrees Fahrenheit (200 degrees Celsius) and allow it to preheat for approximately 5 minutes. This ensures that the tater tots are immediately exposed to high heat, promoting crispness.
Once preheated, arrange the prepared tater tots in a single layer within the air fryer basket, avoiding overcrowding. Cook for a total of 10-12 minutes, but the key to even cooking lies in pausing midway. At the 5-6 minute mark, carefully remove the basket and shake or toss the tater tots to redistribute them. This ensures that all sides are exposed to the hot air, preventing some from becoming overly browned while others remain pale.
Continue cooking for the remaining time, keeping a close watch for your desired level of golden-brown perfection. Cooking times may vary slightly depending on your specific air fryer model and the quantity of tater tots being cooked. Always err on the side of caution, and if needed, add an extra minute or two until they reach your preferred level of crispness. Once done, remove them promptly and savor the delightful crunch!
Microwave Cooking Method
While not the preferred method for achieving maximum crispness, microwaving Ore-Ida Tater Tots offers a quick and convenient solution when time is of the essence. This method is best suited for situations where speed outweighs the desire for a perfectly golden-brown exterior. To begin, select a microwave-safe dish that is adequately sized to hold the desired quantity of tater tots in a single layer.
Next, lightly moisten the tater tots by adding a splash of water to the dish – approximately a tablespoon or two should suffice. This added moisture helps to steam the potatoes, ensuring they cook through evenly. Cover the dish with microwave-safe plastic wrap, leaving a small vent to allow steam to escape. This prevents pressure buildup and potential splattering during the cooking process.
Microwave cooking times will vary depending on the wattage of your microwave. As a general guideline, start with 1-2 minutes on high power, then check for doneness. The tater tots should be heated through, but may not be crispy. Let the tater tots stand for a minute or two before serving. Microwaving is the fastest and easiest method.
Preparing Tater Tots for Microwaving
When opting for the microwave method to cook your Ore-Ida Tater Tots, a few simple steps can significantly improve the outcome, even though you won’t achieve the same level of crispness as with oven baking or air frying. Begin by selecting a microwave-safe dish large enough to accommodate the number of tater tots you wish to prepare. A shallow dish is preferable, as it allows for more even heating.
Arrange the frozen tater tots in a single layer within the dish, avoiding overcrowding. Overlapping can lead to unevenly cooked tots, with some remaining cold while others become overly soft. Next, introduce a small amount of moisture to aid in the steaming process. This can be achieved by sprinkling a tablespoon or two of water over the tater tots, or by lightly dampening a paper towel and placing it over them.
Finally, cover the dish with microwave-safe plastic wrap. Ensure that one corner of the plastic wrap is slightly vented to allow steam to escape. This prevents the wrap from bursting during cooking and helps to maintain a more even distribution of heat. Now, you’re ready to microwave!
Microwave Cooking Time
Microwaving Ore-Ida Tater Tots is undeniably the fastest method, ideal for those moments when time is of the essence. However, achieving perfectly cooked, crispy tots requires careful attention to timing. The precise cooking time will vary depending on your microwave’s wattage and the quantity of tater tots you’re preparing.
As a general guideline, start with an initial cooking time of 2 to 3 minutes on high power for a single serving (approximately 6-8 tater tots). After the initial cooking period, carefully remove the dish from the microwave, being mindful of the hot steam. Gently shake the dish or stir the tater tots to redistribute them, ensuring more even cooking.
Re-cover the dish and continue microwaving in 30-second intervals. After each interval, check the tater tots for doneness. They should be heated through, and slightly softened. Be cautious not to overcook them, as this can result in a mushy texture. Once they reach the desired consistency, let them stand for a minute before serving, as they will continue to cook slightly from the residual heat.
Alternative Cooking Methods
Beyond the conventional oven, air fryer, and microwave, there exist several alternative methods for preparing Ore-Ida Tater Tots, each offering a unique twist on the classic snack. One such method involves using a skillet or frying pan on the stovetop. This approach allows for precise control over browning and crispness, resulting in a satisfyingly textured final product.
To cook tater tots in a skillet, begin by heating a thin layer of oil (vegetable or canola oil works well) over medium heat. Once the oil is hot, carefully add the frozen tater tots to the skillet in a single layer, ensuring not to overcrowd the pan. Cook for approximately 5-7 minutes, turning frequently to promote even browning on all sides.

Keep a close watch on the tater tots, adjusting the heat as needed to prevent burning. Once they are golden brown and heated through, remove them from the skillet and place them on a paper towel-lined plate to drain excess oil. Season with salt and any other desired spices before serving. This method delivers a crispy exterior and a tender interior.
Serving and Enjoying Tater Tots

Once your Ore-Ida Tater Tots are cooked to golden perfection, the possibilities for serving and enjoying them are virtually endless! These crispy potato bites are a versatile side dish, a fun snack, or even a creative ingredient in more elaborate recipes. For a classic pairing, serve them alongside burgers, sandwiches, or hot dogs for a comforting and satisfying meal.
Dipping sauces can elevate your tater tot experience to new heights. Ketchup is a timeless favorite, but don’t hesitate to experiment with other options like ranch dressing, barbecue sauce, cheese sauce, or spicy mayo. For a more adventurous twist, consider serving your tater tots with a sprinkle of grated cheese, a dollop of sour cream, or a garnish of chopped chives.
Beyond simple sides, tater tots can be incorporated into casseroles, breakfast scrambles, or even used as a creative topping for salads or nachos. Their crispy texture and mild flavor make them a welcome addition to a wide variety of dishes. Whether you enjoy them as a nostalgic treat or a culinary experiment, Ore-Ida Tater Tots are sure to bring smiles to your table.